The Empire Gem
Torpedoed January 23, 1942
8,139
Gross Tons
463
feet 2inches Length, 61 feet 2inches Beam, 33feet 1inch Deep
Owner:
British Tanker Company of London
Builder:
Harland & Wolff, Ltd., Glasgow, Scotland
Depth
150 feet
History of the Ship
Empire Gem was
laid down as hull number 1045G at the Harland & Wolff yard in Glasgow,
Scotland and launched on May 29, 1941. The Harland & Wolff yard began constructing vessels in 1861 in
Ireland. By 1912 they had acquired a yard in Glasgow, Scotland and moved
the majority of their effort there, mainly due to growing political instability
in Ireland. In latter years the yard returned to operations in Belfast,
where they still conduct shipyard work today. The yard has constructed a
wide range of vessels, but are most famously know as the builder for all the
White Star Line vessels, to include the ill fated RMS Titanic.
Though built in the yard that produced the most elegant
luxury liners of the era, the Empire Gem was not a luxurious vessel, but a
workhorse designed to carry over ten thousand tons of oil products. She
was a Ocean Design tanker that was Diesel powered and could efficiently make
reasonable speed. The Ocean type tankers were sometimes known as the
'Three Twelves Type', being about 12,000 tons deadweight with a speed of around
12 knots and a fuel consumption of 12 tons per day. The Gem was under the
control of British Ministry of War Transport (British Tanker Co. London as the
managers) so the Gem was given the prefix name of "Empire", in keeping with the
British method of naming all the ships built or pressed into government service
for the war effort being prefixed as "Empire". When she sailed to
America to transport gasoline and oil products for the British war efforts, she
was basically a government ship being run by a private management company.
Sinking of the Ship
Francis Reginald Broad, the British master of the British tanker Empire
Gem, was a confident, self-assured man as his 8,139 ton vessel left Port
Arthur, Texas on January 18, 1942. He was proud of the cargo she was carrying
- 10,600 tons of gasoline for the Petroleum Pool Board. He was equally
proud of his all British crew, which he felt was thoroughly loyal and able
to deal with any of the hardships of war.
The Gem's full load was being transported from Port Arthur to the United
Kingdom by way of Halifax, NS, where she was to join a convoy and then cross the
Atlantic for England. Although she
hoped not to use them, the ship was equipped with guns for dealing with
any marauder. On her stern was a four- inch gun, and elsewhere were six
machine guns and a 12 pound anti-aircraft weapon. It was as well to have
them since the German submarines had commenced operations off the eastern
US coast.
The skipper followed the British Naval Control instructions closely as he zigzagged his course up the east coast. Broad took great care to
zigzag and to travel at night with dimmed masthead and side lights.
Less than a week earlier,
submarines had struck three times in the vicinity between Hatteras and
Wimble Shoals so as the Gem neared Cape Hatteras on the morning of January 23rd, the Captain
became more scrupulous in his cautious approach. Late that afternoon, the Gem sighted another merchant ship, the
Venore, who was also headed North.
As night fell, the Gem closed her distance to the Venore until she was
within three miles. Standing
on the bridge, the Captain was pleased to note the clear weather, with
excellent visibility. The moon shone so brightly that the Gem could have
proceeded without her lights but she turned on the running lights and the Venore could be seen in the distance
with her lights also shining brightly.
Unfortunately
for the Empire Gem, Korvettenkapitan
Zapp and his crew in the U-66, a type IX German Submarine, had arrived off Cape
Hatteras on the same day the Gem had sailed from Texas, January 18. Since
then, the U-66 had been working the area sinking vessels and once again the U-66
was about to show their skill and luck with
another expert attack, this time on a large tanker.
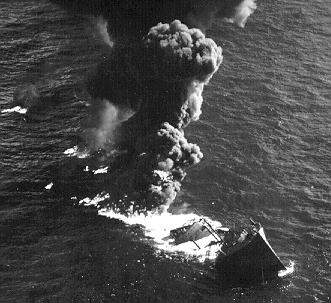
The Gem had reached a position 15 miles southeast of the Diamond Shoals
buoy when she was rocked by a terrific explosion in what the Captain judged
to be one of the after tanks on the starboard side. The damaged section was enveloped in roaring flames which were spreading rapidly.
 The chief radio operator reached the bridge and tried to send a message
after the torpedo hit. At the same time he heard the Venore sending an
SOS. Throughout the calamity, the ship's engines were running, taking the
Gem on a westerly course. Three hours after the attack, the engines finally
stopped. Three officers (the only survivors of 57 men) anchored the still
burning vessel in 28 fathoms of water. As the dawn of the next day crept
over the horizon, the torn and gutted after half broke away and sank.
The chief radio operator reached the bridge and tried to send a message
after the torpedo hit. At the same time he heard the Venore sending an
SOS. Throughout the calamity, the ship's engines were running, taking the
Gem on a westerly course. Three hours after the attack, the engines finally
stopped. Three officers (the only survivors of 57 men) anchored the still
burning vessel in 28 fathoms of water. As the dawn of the next day crept
over the horizon, the torn and gutted after half broke away and sank.
Approximately three hours later, a Coast Guard lifeboat attempted to
rescue the three officers. Rescue was hampered by the flaming gasoline
and the high seas. The trio jumped into the sea to swim to the rescue boat.
However, Radio Operator Ernest McGraw was swept into the burning fuel by
the seas and perished.
It was not until later that the two survivors knew the fate of the Venore.
They had assumed that from the SOS received that the Venore had been attacked
first, when as a matter of fact the glow of the flaming Gem had illuminated
the Venore for Zapp's torpedo attack. The Venore had spotted the submarine
heading for her, and she sped away from the blazing tanker, but even with
evasive maneuvers she had been unable to outrun the sub and the Venore
joined the Gem adding two more vessels to Zapp's record (now totaling five
for this patrol).
Diving
the Gem
Today,
experienced divers will find the Gem (also known locally as the "smell
wreck") in two distinct sections that are in line with each other with
about 75 to 100 feet separating the two. Strangely, the stern section is rotated
180 degrees with the fantail facing the torn off bow section and the engine and
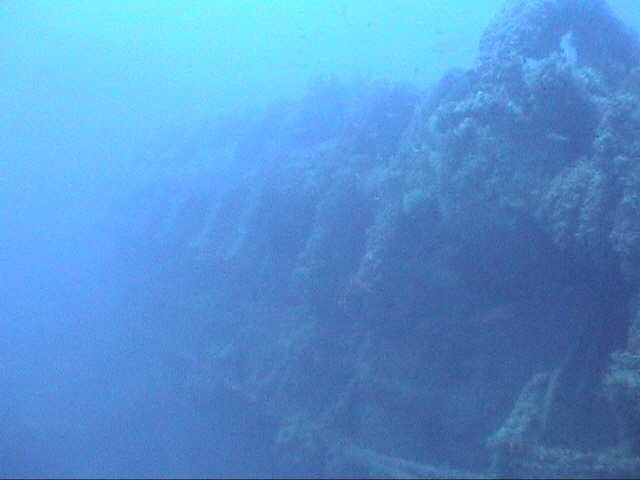
torn section facing away. The bow section is the largest portion
comprising about 2/3 of the wreck and lays completely upside-down.
Although
large and impressive to see, the bow offers nothing other than a large looming
hull bottom to inspect with some sparse scattered debris to either side.
The entire bow section is intact from the stem to where the hull was torn in
half just prior to the engine room. However,
it is completely upside down with both gunnels buried deep in the sand –
simply a huge encrusted hull bottom with nothing in the way of artifacts or
anything else of interest.
The
stern of the wreck is where to find the most exciting diving, as it is fairly
upright with many of the internal portions exposed through the collapsing decks.
The entire stern has a pronounced list to the starboard with a larger amount of
debris lying in the sand to the starboard side. The prop and rudder are
clearly visible as is the steering quadrant and many large deck fittings on the
fantail. Forward of the taffrail to the engine area is fairly intact with
some holes allowing access to the lower decks and machinery. On the port
side just aft of the engine are some areas that can be entered and explored, but
I have yet to find much of interest in these small compartments.
 At
the engine room, the structure has fallen away exposing the large engines and
other equipment. The twin diesel engines are arranged not side by side,
but fore and aft on the centerline of the engine room. They are at least 8 to ten feet wide and the tops of the
engines have massive rocker arms that are a yard long.
About 25 feet forward of the engines the wreck ends abruptly where the two
sections where torn apart. This
exposes the remains of the torn away and collapsing decks descending to the sand
where a debris pile of torn metal and various fittings is found.
At
the engine room, the structure has fallen away exposing the large engines and
other equipment. The twin diesel engines are arranged not side by side,
but fore and aft on the centerline of the engine room. They are at least 8 to ten feet wide and the tops of the
engines have massive rocker arms that are a yard long.
About 25 feet forward of the engines the wreck ends abruptly where the two
sections where torn apart. This
exposes the remains of the torn away and collapsing decks descending to the sand
where a debris pile of torn metal and various fittings is found.
The
wheelhouse is found upside-down, just off the side of the wreck several yards
away. In the standard visibility
you will not be able to see from the main wreck to the wheelhouse. At the sand there is a scattered debris field and divers have
reported seeing portholes and other artifacts there. It will take many dives to see the whole stern section
clearly as visibility varies greatly with the current, which can be very strong
in this area and usually is. However, we have dived the Gem in conditions
with no current and over 100 feet of visibility and it is even more impressive in these
circumstances. One must watch their gauges as we have seen over 150' in
the wash areas and there are some deep holes out in the debris field to the
starboard side of the wreck as well. Time
seems to go quickly when diving the Gem maybe it's all the great artifacts and
big fish. 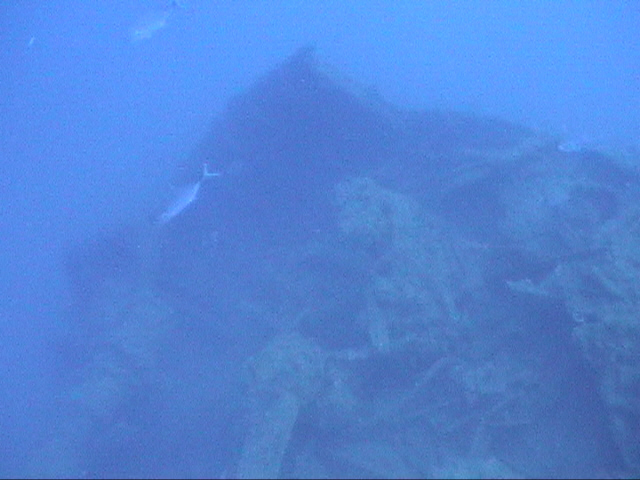
Come
see for yourself why the Gem truly is a "gem".
Take
a look at Paul
Hudy's Empire Gem Web Page for a few more underwater photos and additional
information.
DiveHatteras Home
Send mail to webmaster@divehatteras.com with
questions or comments about this web site.
Copyright © 2003 Dive Hatteras LLC
Last modified:
February 11, 2016