The Tanker MV Australia
Torpedoed March 16, 1942
Torpedoed March 16, 1942
18,686
Tons Deadweight
530
feet Length, 70 feet Beam, 31, 1 3/4" feet Deep
Owner: The Texas Company (Texaco)
Builder: Sun Shipbuilding and Dry Dock Co., Chester, PA
Depth 110 feet
Location: 3 NM South of Diamond Shoals Light Tower
|
History of the Australia Built in 1928, the MV Australia (formerly the Mary Ellen O'Neil) carried a variety of petroleum products in support of Texaco's marine transportation system and sailed mainly between U.S. ports. She had been acquired by Texaco from the California Petroleum Corporation the same year she had been built, along with four other modern tankers from the California Company. With a length of 530 feet and a gross tonnage of 18,686, the MV Australia was one of the largest vessels to meet demise on the Diamond Shoals off Cape Hatteras, NC. |
|
|
Texaco Tanker Australia foredeck from the wing bridge, which is in the below photo. Photo courtesy Texaco Inc, Marine Department |
Early in the morning on March 15, 1942, the Australia was on her way to New Haven, Connecticut, from Port Arthur, TX, carrying a crew of forty men and a full cargo. When she was approaching the outer banks of North Carolina, her master, Captain Martin Ader, received distress signals from the SS Olean and the SS Ario. Both vessels had been torpedoed in the same area that Martin was headed towards. The Ario sunk, the Olean was heavily damaged but later towed to a shipyard for repair. Sailing alone, unarmed, and laden with 110,000 barrels of heavy fuel oil (valued at $140,076 in 1942 prices), Ader turned Australia south to Frying Pan shoals and waited there until noon. Captain Ader then proceeded north following a course that took the Australia through Onslow Bay, as close to the shoreline as safety would permit. Outside of Beaufort Inlet (Morehead City), the Australia found herself enveloped in heavy fog and bad weather. The Captain turned her south again and remained in the area of Lookout Bight for a couple of hours before turning north for the third time and proceeded around Cape Lookout.
|
|
Australia Starboard side aft while underway. Photo taken from the forward mast and is courtesy Texaco Inc, Marine Department |
The Port Director at Port Arthur had instructed that vessels pass Cape Hatteras, and an area thirty miles to each side, in daylight hours. This precaution was in response to something most merchant seaman sailing off the eastern coast of the United States already knew: the waters were dangerous out there, especially at night. In the month of March alone, nearly one ship per day was sunk by German U-boats as the US Navy made a poor showing of coastal defense. Most U-boats preferred to attack under the cover of darkness when they could travel quickly on the surface and still sneak up on their victims, leading to the request to pass Hatteras during the daylight hours. Around 5:30 am, March 16th, the Australia proceeded northward, close to Ocracoke Inlet and then took up zigzagging Easterly course at a speed of 11 knots to head around the Diamond Shoals. As the Australia approached the three buoys off Cape Hatteras, weather conditions deteriorated. Although the sea was calm, visibility toward shore was hazy, and to seaward about five to ten miles. Several other merchant vessels were also in the area of the Diamond Shoals not far from the Australia. |
|
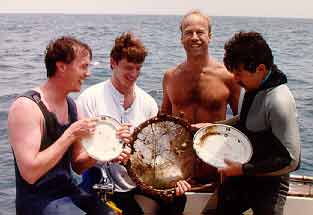
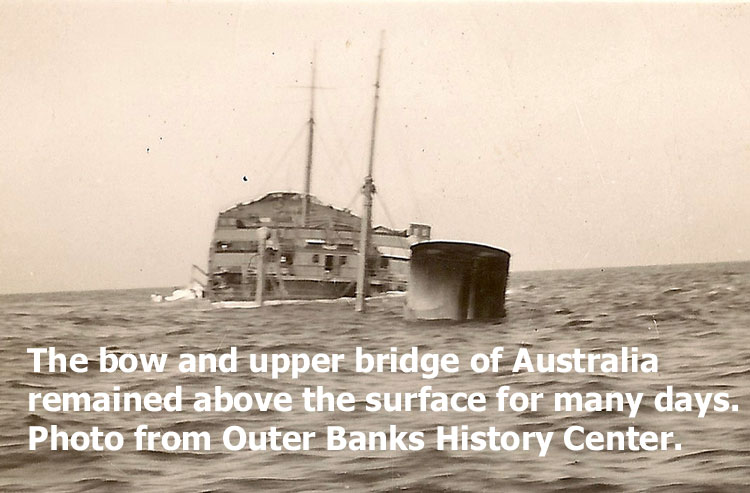
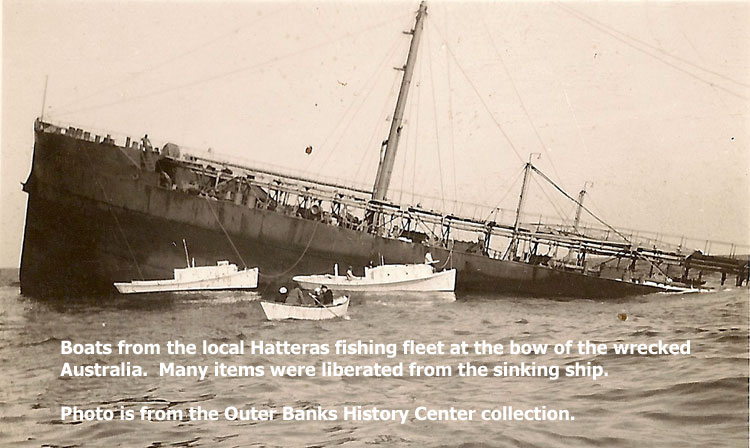
The wreck sat in it's final resting place for some time with the bow section exposed and local Hatteras Islanders took full advantage of the opportunity to visit the site and liberate anything of value that was available above the water level. Eventually, the tanker slipped beneath the sea and due to her location was targeted for clearing operations as a hazard to navigation. The wreck was dragged to provide at least 42 feet of clearance and the site subjected to practice bombing runs by pilots in training from Cherry Point.
William Johnson was the only licensed Merchant Mariner who perished, the other non-licensed crewmen that perished were; Ages H. Haywood (Jr. Engr.), Johan B. Nyholm (Pumpman), William D. Swann (Wiper). During WWII the Texaco Company lost 9 vessels under their flag and 202 Texaco crewman perished as a result of enemy action.
|
|
|
Diving the Australia
Due to the currents and sandy bottom of this area, the wreck sites are subjected to migrating sand waves which can cover and uncover portions of the wreck in cycles. The wreck debris that divers can see on the Australia may vary from year to year due to this phenomenon. Currently, in 2021, the Ausi is fairly coverd by the sands of the Diamond Shoals. The bow section is almost totaly below the sand, the stern is mostly covered with just the high stern castle and larger sections of the engine area exposed. Just up current of the stern is a very high and impressive sand wave taller then the exposed stern and how long the stern will remain divable is in question. The following site description is from visits in previous years. |
|
|
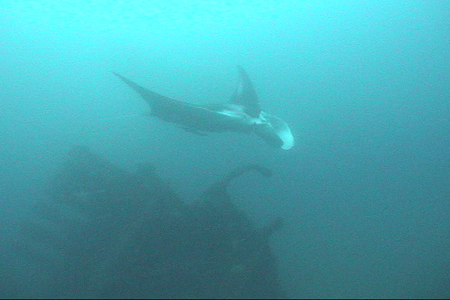
Manta Ray swims over the stern of the Australia. Mantas can be seen in the area from August thru December. Dive Hatteras photo
|
The
Ausi is broken into two main sections separated by about 200 yards and the two
sections lay too far apart for divers to swim between. The stern section
is the smaller of the two and sits in a small depression in the sand with the
port side towards the dominant bottom current. Most of the
time there is a large sand wall just up current (port side) of the stern section
and a somewhat flat sand area down current (starboard side) which is towards the
Diamond Tower. During the 2007 season, the sand wall migrated past the
wreck and exposed the large prop and a great deal of debris on the port side of
the wreck all of which was previously under the sand.
The actual stern is one of the most intact structures on the site and rises about 25 feet from the bottom, tilted to the starboard about 30 degrees. There is lettering of about 2 feet high still visible across the back of the ship that clearly spell out some of the name "STRA" . Don't bother to try and take them though as they are steel and crumble at the touch of a chisel or crow bar - this is a look and enjoy moment for a real wreck diver. |
 Forward of the
actual stern the wreck maintains the list to starboard and stays fairly intact.
The prominent features of the debris are very large heat exchangers (look like
boilers, but smaller in diameter with flanged ends) and the very large diesel
engines. There is a great amount of wire, pipes and hoses in this section
along with various other unidentifiable artifacts for a diver to explore.
Along the starboard side near the engines is an area where the wreck provides a large
overhang under which sea life is often found hiding from the current. Just
off the starboard side is a the remnants of what appears to be the deck house, but it
is buried deeply in the sand at this time. The wreckage ends abruptly
just forward of the engines where the hull was broken off. If the current
is light, in one dive at
the stern section you can swim the entire site and get a very good idea of the
general layout but coming up with a great artifact may take a few more dives... Forward of the
actual stern the wreck maintains the list to starboard and stays fairly intact.
The prominent features of the debris are very large heat exchangers (look like
boilers, but smaller in diameter with flanged ends) and the very large diesel
engines. There is a great amount of wire, pipes and hoses in this section
along with various other unidentifiable artifacts for a diver to explore.
Along the starboard side near the engines is an area where the wreck provides a large
overhang under which sea life is often found hiding from the current. Just
off the starboard side is a the remnants of what appears to be the deck house, but it
is buried deeply in the sand at this time. The wreckage ends abruptly
just forward of the engines where the hull was broken off. If the current
is light, in one dive at
the stern section you can swim the entire site and get a very good idea of the
general layout but coming up with a great artifact may take a few more dives... |
|
 Divers can visit either the bow or the stern
section, most seem to prefer
the stern; however the bow should not he totally discounted. We have visited
the bow section in water conditions that could best be described as
"Ultimate Hatteras" in nature: unlimited visibility and abundant marine life and
there is plenty to see and explore. The bow wreckage lays on a much
flatter area to the South and just slightly shallower than the
stern section. It is easier to find on a sonar search on your first visit
to the site and therefore was the section that was dived for years until the
stern revealed itself (remember back in the early days of wreck diving it was
throw a buoy and search). The actual bow is very intact and points
towards the surface surrounded by a shallow bowel of sand. The rest of the
tanker wreck is scattered aft of the bow in a meandering debris field of jumbled
plates and beams that end in a non distinct fashion. The jumble of metal
provides a great number of holes and structure for the sea life to hide in and
this section is fished heavily by the Hatteras bottom fishing boats. Divers can visit either the bow or the stern
section, most seem to prefer
the stern; however the bow should not he totally discounted. We have visited
the bow section in water conditions that could best be described as
"Ultimate Hatteras" in nature: unlimited visibility and abundant marine life and
there is plenty to see and explore. The bow wreckage lays on a much
flatter area to the South and just slightly shallower than the
stern section. It is easier to find on a sonar search on your first visit
to the site and therefore was the section that was dived for years until the
stern revealed itself (remember back in the early days of wreck diving it was
throw a buoy and search). The actual bow is very intact and points
towards the surface surrounded by a shallow bowel of sand. The rest of the
tanker wreck is scattered aft of the bow in a meandering debris field of jumbled
plates and beams that end in a non distinct fashion. The jumble of metal
provides a great number of holes and structure for the sea life to hide in and
this section is fished heavily by the Hatteras bottom fishing boats. |
|
|
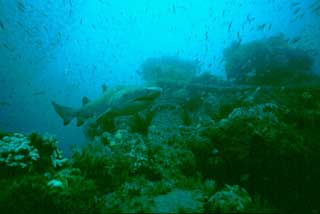
Large Sandtiger Shark guards the engine of Australia. Dive Hatteras photo |
In the early days of Hatteras diving, the Australia was visited infrequently and it still takes the right combination of weather and current to get a dive here. The Australia has given up many treasures and will likely give up more over time. Over the seasons some beautiful plates, gauges, and portholes have been recovered and sharks posed for those divers taking their cameras down. On several dives we have encountered well over 100 sharks on the wreck and then strangely, we often will find none at the tanker. The Australia is one of our favorite wrecks; maybe it's fitting that sea conditions only allow sporadic diving; it keeps us coming back for more. There is a large scale model of the MV Australia on display at the American Merchant Marine Museum in Kings Point, New York (Long Island), that divers who have visited the actual shipwreck site may be interested in viewing. You can find additional information and some very good photos of the Australia at Paul Hudy's BFDC website.
|
|
|
|
Send mail to webmaster@divehatteras.com with
questions or comments about this web site.
Copyright © 2003
Dive Hatteras
Last modified:
June 12, 2021
All Information, Content and Photos contained on the DiveHatteras web site is property of and copyright by DiveHatteras LLC, Dave and Ann Sommers, unless otherwise noted and my not be used without permission.
 Awaiting the Australia, was the U-332, commanded by Kapitanleutnant
Liebe. A single torpedo hit the Australia in the starboard side of the
engine room killing four duty personnel; the only casualties she suffered.
The
ship settled so quickly that men below decks had water rising around their feet
as they were fleeing to the open decks and within a few moments the afterdecks
were awash. The Coast Guard received a wireless message from the ship's radio operator
and immediately answered. Captain Ader ordered abandon ship and seven minutes after
the attack all remaining crewman were safely aboard lifeboats. Eventually
they were rescued by the SS William J. Salmon, a ship passing by the Australia
on a southerly course. This favor was returned to the crew of the SS
Salmon on May 18, 1942, when the SS Salmon was torpedoed and sunk off the coast
of Cuba and the Salmon crew were picked up by another ship.
Awaiting the Australia, was the U-332, commanded by Kapitanleutnant
Liebe. A single torpedo hit the Australia in the starboard side of the
engine room killing four duty personnel; the only casualties she suffered.
The
ship settled so quickly that men below decks had water rising around their feet
as they were fleeing to the open decks and within a few moments the afterdecks
were awash. The Coast Guard received a wireless message from the ship's radio operator
and immediately answered. Captain Ader ordered abandon ship and seven minutes after
the attack all remaining crewman were safely aboard lifeboats. Eventually
they were rescued by the SS William J. Salmon, a ship passing by the Australia
on a southerly course. This favor was returned to the crew of the SS
Salmon on May 18, 1942, when the SS Salmon was torpedoed and sunk off the coast
of Cuba and the Salmon crew were picked up by another ship.
 Just
a short time after the sinking, one of the MV Australia crewmen killed in this action, William
W. Johnson, 2nd
Assistant Engineer, had a liberty ship named in his honor. The SS William
W. Johnson was launched by
his widow on Jan 31, 1945, at the Todd Houston Shipbuilding Corp, Houston, TX. The
SS William W. Johnson survived the war and was eventually sold for scrap in
1961.
Just
a short time after the sinking, one of the MV Australia crewmen killed in this action, William
W. Johnson, 2nd
Assistant Engineer, had a liberty ship named in his honor. The SS William
W. Johnson was launched by
his widow on Jan 31, 1945, at the Todd Houston Shipbuilding Corp, Houston, TX. The
SS William W. Johnson survived the war and was eventually sold for scrap in
1961. Because the Australia sunk in shallow depths (100 to 110ft) she was
demolished by the Navy Salvage Service. During the demolition, the bow section
seems to have taken the brunt of the destruction, as the stern is much more
intact. She now rests scattered just off the
Diamond Shoals near the Point Shoals Buoy about 3 miles from the Light
Tower. This area is where currents can often preclude diving and over the
years
we've lost our share of marker buoys!
Because the Australia sunk in shallow depths (100 to 110ft) she was
demolished by the Navy Salvage Service. During the demolition, the bow section
seems to have taken the brunt of the destruction, as the stern is much more
intact. She now rests scattered just off the
Diamond Shoals near the Point Shoals Buoy about 3 miles from the Light
Tower. This area is where currents can often preclude diving and over the
years
we've lost our share of marker buoys!
 Sources Used to develop this web
page:
Sources Used to develop this web
page: